
Main Courses
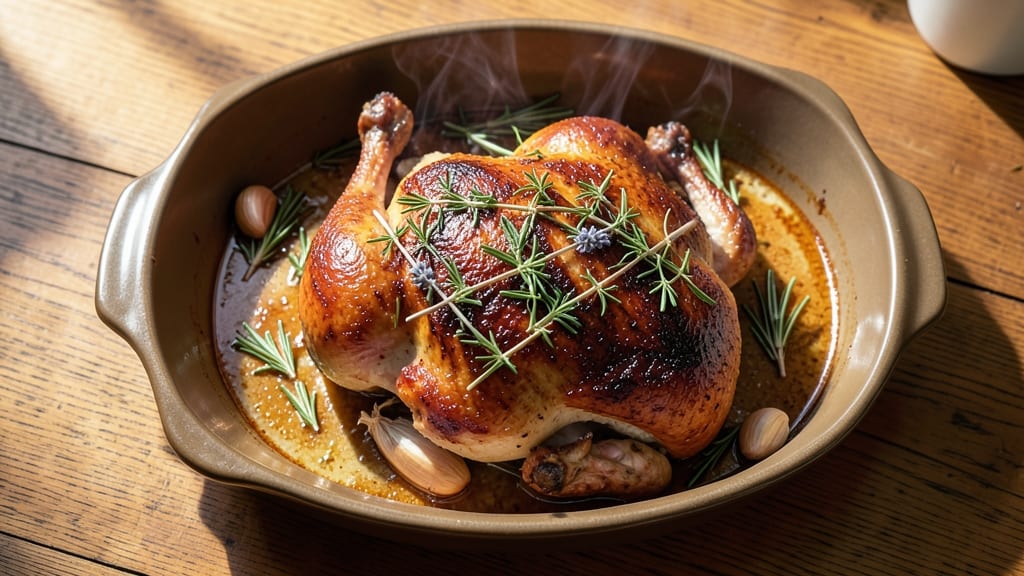
This 5-star roasted chicken recipe delivers restaurant-quality results with golden crisp skin and juicy centers every time. The secret lies in a simple brine that keeps the meat tender, while high-heat roasting creates that coveted caramelized crust.
I've perfected this method after years of testing, and it never fails to impress—whether you're hosting a dinner party or treating yourself to a special meal.
The key to success is patience and precision. A 24-hour brine ensures maximum flavor and moisture retention, while roasting at 425°F guarantees crispy skin without drying out the meat.
Basting with melted butter and herbs during the last 20 minutes adds an extra layer of richness and aroma that elevates this dish to five-star status. The internal temperature must reach 165°F for safety and perfect doneness.
What you'll end up with is a whole roasted chicken that looks as impressive as it tastes—golden, crispy skin that shatters at the touch, and tender, juicy meat that falls apart effortlessly.
The aroma alone will have everyone gathering at the table, and the flavor is a perfect balance of savory, herby, and slightly caramelized notes. This is the kind of chicken that makes you feel like a professional chef, even if you're cooking for the first time.
Serve with a simple herb butter for dipping, roasted vegetables for a complete meal, or a fresh salad to balance the richness. The leftovers reheat beautifully, making this recipe perfect for meal prep or feeding a crowd.
Let's get started on creating your five-star roasted chicken—it's easier than you think!
Ingredients for 5 star roasted chicken
These ingredients transform ordinary chicken into a restaurant-worthy centerpiece with crispy skin and juicy perfection.
| Ingredient | Amount | Notes |
|---|---|---|
| Whole Chicken (3-4 lbs) 🍗 | 3 ½ lb | Fresh, preferably organic |
| Kosher Salt 🧂 | ½ cup | Diamond Crystal preferred |
| Granulated Sugar 🍚 | ¼ cup | For balanced brine |
| Fresh Thyme Sprigs 🌿 | 10 whole | Or 1 tbsp dried thyme |
| Fresh Rosemary Sprigs 🌿 | 4 whole | Or 1 tsp dried rosemary |
| Garlic Cloves 🧄 | 6 cloves | Smashed for flavor infusion |
| Unsalted Butter 🧈 | ½ cup | Cold, cubed for basting |
| Extra-Virgin Olive Oil 🫒 | 2 tbsp | For crispy skin |
| Fresh Lemon Juice 🍋 | ¼ cup | Brightens flavor |
| Black Peppercorns 🌶️ | 1 tbsp | Freshly cracked |
| Fresh Parsley 🌿 | ¼ cup | Chopped for garnish |
| Water 💧 | 4 cups | For brine solution |
The chicken is non-negotiable—3-4 lbs gives you generous portions for four people. Costco or your local butcher often have excellent organic options, but any fresh whole chicken works. Look for good marbling around the neck and legs—this means more flavor. The brine ingredients are simple but essential: kosher salt (Diamond Crystal dissolves better than table salt) and sugar for balance. Fresh herbs (thyme and rosemary) add depth, but dried works in a pinch if you're short on time. I always grab extra herbs because the aroma alone makes the kitchen smell like a French bistro.
No fresh herbs? Dried thyme and rosemary at one-third the amount still deliver. Running low on butter? Olive oil works in a pinch**—just use 1/4 cup instead. The lemon juice can be bottled, but fresh is brighter. For the garlic, smash the cloves with the flat side of your knife—this releases more flavor into the brine. The olive oil is your secret weapon for crispy skin, so don't skip it. If you're prepping ahead, make the brine up to 24 hours early and store it in the fridge until ready to use.
This chicken reheats beautifully—just warm it in a 350°F oven for 20 minutes with a splash of water. The leftovers keep for 3-4 days in the fridge, but honestly, they won't last that long. I always make a double batch because it's perfect for sandwiches or salads the next day. Store any extra pieces in an airtight container with a paper towel to absorb moisture. Freezing isn't recommended as the skin loses its crispiness, but the meat stays juicy for up to 3 months if you're feeling ambitious.
Why You'll Love This Recipe
- Let’s be real: most roasted chicken leftovers taste like sawdust. Not this one. The herbs keep it flavorful for days, and the crispy skin stays intact. I’ll pack it in lunches, shred it for tacos, or just reheat a slice straight from the fridge—no sad, dry bites here.
- Five-Ingredient Magic: I swear by this combo—just salt, sugar, thyme, rosemary, and a whole chicken. That’s it. No confusing spice blends, no last-minute grocery runs. Honestly, the simplicity makes it feel like a win before you even start.
- Crispy-Creamy Perfection: The sugar-salt rub caramelizes into a golden crust while keeping the meat juicy inside. Between us, that crispy edge with the tender center? It’s the kind of chicken that disappears faster than you can say "seconds, please."
- Sunday Dinner Ready: This isn’t just a weeknight meal—it’s the star of game days, potlucks, or when you actually want to feel like a host. I’ve served it at holiday dinners (yes, even Thanksgiving) and never heard a complaint. The aromas alone make the house feel like a restaurant.
Step-by-step instructions for golden crisp roasted chicken
Here's how to transform a simple chicken into a showstopper with restaurant-quality results.
Create the Flavorful Brine
In a large bowl, combine the 4 cups water, 0.5 cup kosher salt, and 0.25 cup granulated sugar. Stir until completely dissolved—this creates a flavorful brine that ensures juicy meat. Add the 3.5 lb whole chicken and submerge it completely. Place a plate on top to weigh it down, then refrigerate for at least 12 hours (up to 24 hours).
The longer it brines, the more flavorful and tender the chicken becomes. I like to brine overnight—this gives the salt time to penetrate deeply and break down muscle fibers. Don't skip this step; it's what makes the difference between good and extraordinary chicken.
Dry and Season the Chicken
Remove the chicken from the brine and rinse thoroughly under cold water. Pat it completely dry inside and out with paper towels—this is CRITICAL for crispy skin. I mean REALLY dry, especially in the cavity and under the wings where moisture tends to hide. Let it air-dry uncovered on a wire rack in the refrigerator for 1 hour while you prepare the seasoning.
In a small bowl, mix together 1 tbsp freshly cracked black peppercorns, 6 smashed garlic cloves, 10 fresh thyme sprigs, and 4 fresh rosemary sprigs. Rub this mixture all over the chicken, including inside the cavity. The garlic and herbs will infuse the meat with incredible flavor as it roasts.
Prepare for Roasting
Preheat your oven to 425°F. Position a rack in the middle position and place a large roasting pan on it. Mix together the 0.5 cup unsalted butter and 2 tbsp extra-virgin olive oil in a small bowl, then brush this mixture all over the chicken—this creates that golden, crispy skin we're after.
Place the chicken breast-side up on the rack in the roasting pan. The rack allows hot air to circulate underneath, ensuring crispy skin all around. Pour the 0.25 cup fresh lemon juice into the bottom of the pan—this will create a flavorful pan sauce later.
Roast to Perfection
Roast the chicken for 1 hour until the skin is deep golden brown and crispy. You'll know it's ready when the internal temperature reaches 165°F at the thickest part of the thigh (use a meat thermometer). Don't open the oven during cooking—every time you peek, you lose heat and steam the skin instead of crisping it.
About 30 minutes before the chicken is done, tent it loosely with aluminum foil to prevent over-browning if needed. The lemon juice in the pan will caramelize slightly, creating a beautiful glaze and adding brightness to the final dish.
Rest and Serve
Transfer the chicken to a cutting board and tent loosely with foil. Let it rest for 15-20 minutes before carving. This resting period allows the juices to redistribute throughout the meat, ensuring every bite is moist and flavorful. Don't skip this step—it's what keeps the chicken juicy instead of dry.
While the chicken rests, skim any fat from the roasting pan and deglaze with 2 tablespoons of water, scraping up all the browned bits. Add this pan sauce to your serving platter. Garnish the chicken with 0.25 cup chopped fresh parsley and serve with the lemon-herb sauce spooned over the top. Each bite should deliver crispy, golden skin with perfectly juicy meat underneath—this is what makes a 5-star roasted chicken!
Pro Tips For Making 5 Star Roasted Chicken
- Pat the Skin Dry: The sugar-salt mix won’t stick properly if the skin’s damp—wipe it down with paper towels before seasoning. I learned this the hard way when my first batch turned out bland because the salt just slid off.
- Start High, End Low: Blast that chicken at 425°F for the first 20 minutes to render fat and crisp the skin, then drop to 375°F. After burning three batches trying to keep it hot the whole time, I finally realized patience wins here.
- Salt the Cavity First: Tuck half the salt and herbs inside the cavity before trussing—it seasons the meat from within. I used to skip this, and the flavor always felt one-dimensional until I tried it.
- Check Thigh Temp, Not Breast: Use a meat thermometer in the thickest part of the thigh (165°F) instead of guessing by color. The breast will cook through by then, but I’ve overdone it twice by relying on visual cues alone.
Storing and reheating this dish
Refrigerator Storage
Store your roasted chicken in an airtight container with a paper towel on top to absorb excess moisture—this keeps the skin crispy for up to 3-4 days.
I like using glass Pyrex containers because they stack neatly and are microwave-safe. Always let the chicken cool to room temperature before refrigerating to prevent condensation buildup. 💫
Freezer Preservation
For longer storage, wrap individual pieces tightly in plastic wrap before placing them in a freezer bag with all air removed. The skin won't retain crispiness after freezing, but the meat stays juicy for up to 3 months.
I recommend portioning into meal-sized servings for easy reheating later. Label with the date to track freshness.
Oven Reheating
Preheat your oven to 350°F and place the chicken pieces on a baking sheet with 1 tablespoon of water or chicken broth in the bottom. Cover loosely with foil and reheat for 20-25 minutes until reaching 165°F internally. This method restores moisture and maintains texture better than the microwave. 🔥
Microwave Method
For quick reheating, place chicken pieces on a microwave-safe plate with a damp paper towel covering them. Heat on 50% power in 1-minute intervals, stirring between each, until reaching 165°F.
Add a splash of water if the meat appears dry. This takes about 3-4 minutes total for most pieces.
Leftovers Reinvention
Transform leftover chicken into chicken pot pie by shredding the meat and mixing with veggies and cream sauce. Or make chicken salad with mayo, celery, and grapes for sandwiches. The possibilities are endless—just store pieces separately to reheat as needed. The flavor actually improves after the first day! ✨
Nutrition facts
Frequently asked questions
How long should I brine the chicken for? For maximum flavor and juiciness, brine the chicken for 12-24 hours. The longer it brines, the more tender and flavorful the meat becomes. I recommend overnight brining for the best results. Just
Why is drying the chicken so important?
Drying the chicken completely before roasting is CRITICAL for crispy skin. Any moisture left on the surface will steam the skin instead of crisping it. Pat it dry with paper towels and let it air-dry on a rack for 1 hour to remove all surface moisture. This step makes all the difference between soggy and perfectly crisp skin!
Can I use a different herb blend?
While this recipe uses thyme and rosemary, you can experiment with other herbs like sage, oregano, or even a mix of garlic powder and paprika for a smoky flavor. The key is to use fresh herbs (or dried at 1/3 the amount) and rub them thoroughly under the skin and in the cavity for maximum flavor infusion.
What if my chicken isn't crispy? If your chicken skin isn't crispy, it's likely because of moisture or insufficient heat.
How do I know when the chicken is fully cooked?
Use a meat thermometer to check the internal temperature at the thickest part of the thigh. The chicken is fully cooked when it reaches 165°F. The skin should also be deep golden brown and crispy. Never rely on color alone—always use a thermometer for food safety.