
Main Courses
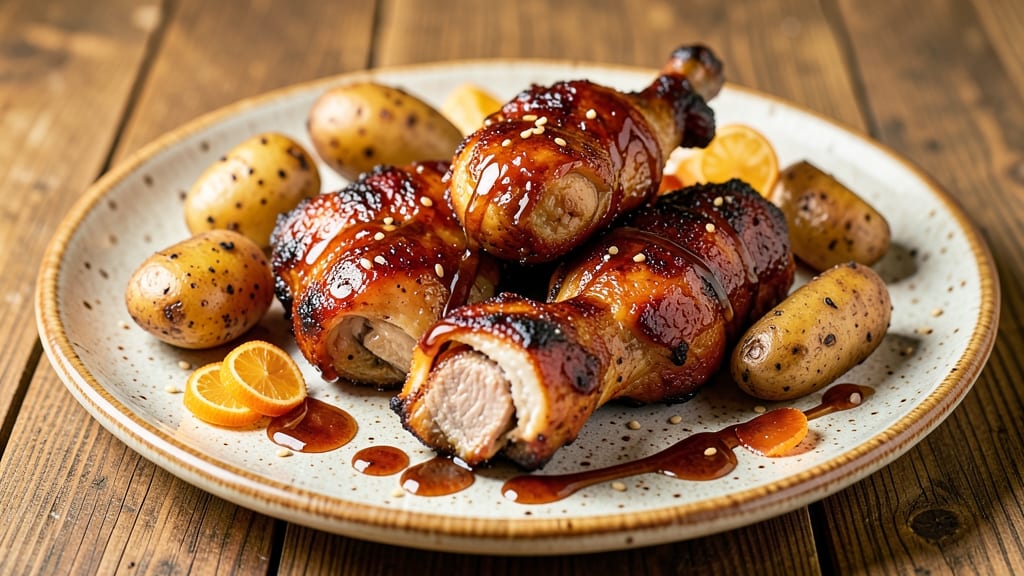
This baked teriyaki chicken legs recipe delivers the perfect balance of crispy skin and sticky, caramelized glaze—no deep-frying required. The secret lies in marinating the chicken overnight, ensuring deep flavor penetration while the high-heat bake creates that coveted texture contrast.
I developed this method after years of experimenting with restaurant-style techniques at home, and it never fails to impress.
What sets this recipe apart is the glossy teriyaki glaze that bakes right onto the chicken, creating a sweet-savory crust without overwhelming the natural taste of the meat. The marinade transforms simple chicken legs into restaurant-quality bites, while the baking process keeps everything juicy inside.
This method is foolproof for weeknight dinners or special occasions—just set it and forget it for 45 minutes of hands-off cooking.
By the time these chicken legs emerge from the oven, you'll have golden-brown skin that shatters at the touch, tender meat that falls off the bone, and a glaze so rich it drips with every bite.
The aroma alone will have everyone gathering around the table, and the visual appeal makes it perfect for serving guests or meal prepping. The sauce is balanced—sweet enough to caramelize but with enough umami to complement the chicken beautifully.
Pair these with steamed rice and quick stir-fried vegetables for a complete meal, or serve over mashed potatoes for a heartier option. The leftovers reheat wonderfully, making this a practical choice for busy families.
Ready to create restaurant-quality chicken legs at home? Let's get started with this simple yet impressive technique.
Ingredients for baked teriyaki chicken legs
Sixteen ingredients transform ordinary chicken legs into restaurant-quality teriyaki masterpieces with crispy skin and sticky glaze.
| Ingredient | Amount | Notes |
|---|---|---|
| Chicken Legs (Thigh-Drumstick) 🍗 | 1 ½ lb | Bone-in, skin-on preferred |
| Teriyaki Sauce 🍶 | ¾ cup | Store-bought or homemade |
| Honey 🍯 | 2 tbsp | For extra glaze caramelization |
| Soy Sauce 🥄 | ½ cup | Low-sodium preferred |
| Garlic Cloves 🧄 | 6 cloves | Minced for marinade depth |
| Fresh Ginger 🌿 | 2 tbsp | Grated, for aromatic balance |
| Sesame Oil 🫒 | 1 tbsp | Toasted sesame for aroma |
| Rice Vinegar 🍶 | 1 tbsp | For acidity balance |
| Brown Sugar 🍚 | ¼ cup | Light or dark variety |
| Olive Oil 🫒 | 1 tbsp | For crispy skin development |
| Diamond Crystal Kosher Salt 🧂 | 1 tsp | For seasoning chicken |
| Ground Black Pepper 🌶️ | ½ tsp | Freshly ground preferred |
| Cornstarch 🌾 | 1 tbsp | For glaze thickening |
| Sesame Seeds 🌾 | 1 tbsp | Toasted for garnish |
The chicken legs are the foundation—bone-in, skin-on for maximum flavor and texture. Look for fresh, plump legs with minimal bruising, ideally from a butcher or high-quality grocery store like Whole Foods or Kroger. The skin should be intact and unbroken for optimal crispiness. If using frozen, thaw overnight in the fridge. For extra insurance, pat the skin dry with paper towels before marinating to encourage crispiness. The legs should be roughly 6-8 ounces each for consistent cooking times.
No teriyaki sauce? Combine 0.5 cup soy sauce, 2 tbsp honey, 1 tbsp rice vinegar, 1 tbsp sesame oil, and 1 tbsp brown sugar for a quick homemade version. The low-sodium soy sauce is crucial—it prevents the marinade from tasting overly salty. Fresh ginger and garlic can be swapped for 1 tsp ground ginger and 1 tsp garlic powder in a pinch, though fresh is preferred. For a glossier finish, add 1 tsp cornstarch to the sauce before applying. The sesame seeds should be toasted in a dry pan for 30 seconds to enhance their nutty aroma—don’t skip this step.
Marinate the chicken overnight for maximum flavor penetration, but at least 4 hours if short on time. Store leftovers in an airtight container for up to 4 days in the fridge, though the glaze may dry out slightly. For longer storage, freeze cooked chicken for up to 3 months. Reheat in a 350°F oven for 10-15 minutes to restore crispiness. The sauce can be made ahead and stored in the fridge for up to 1 week, or frozen for 3 months. Garnish with toasted sesame seeds just before serving for that restaurant-quality finish.
Why You'll Love This Recipe
- One-Pan Magic: I swear by this recipe when I’m too tired to scrub pots—just toss the chicken legs, garlic, and sauce on a sheet pan, and let the oven do the work. The honey and soy caramelize into a sticky glaze that’s basically foolproof.
- Sweet-Savory Crunch: That crispy skin with the tender meat inside? It’s the best of both worlds. The garlic cloves roast into fragrant nubs, and the teriyaki sauce turns into a glossy, addictive coating that’ll have you licking the plate.
- Meal Prep MVP: Between us, this is my go-to for busy weeks. Bake a big batch on Sunday, and you’ve got lunch or dinner covered—pack them cold for work or reheat them straight from the fridge. (Yes, even on a Tuesday night.)
- Budget-Friendly Feast: Chicken legs are cheaper than breasts, and this recipe stretches every dollar without skimping on flavor. Plus, the leftovers? They’re even better the second day, especially tossed with rice or noodles. My wallet—and my family—thank me.
Step-by-step instructions for baked teriyaki chicken legs
Master the balance between crispy skin and sticky-sweet glaze with this precise baking method.
🍳 Step 1: Prepare the Glaze and Marinade
In a medium bowl, combine the 0.75 cup teriyaki sauce, 2 tbsp honey, 0.5 cup soy sauce, 6 cloves minced garlic cloves, 2 tbsp grated fresh ginger, 1 tbsp sesame oil, 1 tbsp rice vinegar, and 0.25 cup brown sugar. Whisk vigorously until the brown sugar dissolves completely and the mixture becomes smooth and glossy.
This marinade serves dual purposes: tenderizing the chicken and creating the signature glaze. The honey and brown sugar will caramelize beautifully during baking, while the acidity from the rice vinegar ensures balanced flavor. Taste the mixture now—it should be sweet, salty, and aromatic with bright ginger and garlic notes. If too thick, add 1 teaspoon water to adjust consistency.
👨🍳 Step 2: Coat and Rest the Chicken
Pat the 1.5 lb chicken legs (thigh-drumstick) thoroughly dry with paper towels—this is critical for achieving crispy skin. Place them in a shallow dish and pour the marinade over, turning to coat completely. Use your hands to ensure every inch of skin is covered with the glaze.
Let the chicken rest uncovered in the refrigerator for at least 30 minutes, or up to 2 hours for deeper flavor penetration. This resting period allows the marinade to work its magic, breaking down proteins for tenderness while the skin absorbs the glaze. Pro tip: If you're short on time, let it marinate at room temperature for 15 minutes before baking—just don't exceed this time to prevent bacterial growth.
🔥 Step 3: Bake for Crispy Skin and Tender Meat
Preheat your oven to 400°F with a rack positioned in the lower third. Line a baking sheet with aluminum foil for easy cleanup. Arrange the chicken legs skin-side up on the prepared sheet, leaving 1 inch between each piece for proper air circulation.
Bake for 45 minutes, then flip each leg and rotate the baking sheet for even browning. Continue baking for another 20-25 minutes until the skin is deep golden brown and crispy, and the internal temperature reaches 175°F at the thickest part of the thigh. The glaze should be bubbling and caramelized, with a slight crackling sound when you tap the skin. If the glaze thickens too quickly, tent the chicken loosely with foil for the last 10 minutes to prevent burning.
🥘 Step 4: Thicken the Glaze and Finish
While the chicken rests, transfer the baking sheet to the stovetop over medium heat. In a small bowl, whisk together 1 tbsp cornstarch with 2 tablespoons water to create a slurry. Slowly pour this into the pan juices, stirring constantly for 2-3 minutes until the glaze thickens to a glossy consistency.
Return the chicken to the baking sheet and spoon the thickened glaze evenly over the top. Sprinkle with 1 tbsp toasted sesame seeds for texture and aroma. The glaze should now coat the chicken in a sticky, caramelized layer that's neither too runny nor too dry. This final step ensures every bite delivers that perfect balance of sweet, salty, and umami flavors.
⏰ Step 5: Rest and Serve with Confidence
Transfer the chicken to a cutting board and let it rest for 10 minutes before serving. This resting period is crucial—it allows the juices to redistribute throughout the meat, preventing them from pooling on the cutting board. The skin will remain crispy while the interior stays juicy and tender.
Slice each leg between the thigh and drumstick, then cut the meat away from the bone. The result should be perfectly crispy skin that shatters slightly when bitten, contrasting with the tender, flavorful meat underneath. Serve immediately with steamed rice and steamed vegetables to soak up the delicious glaze. The dish holds well for 2 hours at room temperature, though the skin may soften slightly if left longer than that.
Pro Tips For Making Baked Teriyaki Chicken Legs
- CRANK THE OVEN HIGH FIRST: Start your chicken legs at 425°F (220°C) for 20 minutes—this sears the skin and locks in juices before you lower the heat. After burning three batches at 375°F, I finally realized high heat upfront makes all the difference for crispy skin without drying out the meat.
- SEAR SKIN BEFORE SAUCE: Pat the chicken legs bone-dry with paper towels, then let them sit uncovered on a wire rack for 10 minutes. Once the oven’s hot, sear skin-side down in a cold pan for 2 minutes—this crispy base holds up better under the teriyaki sauce, even when baked.
- THICKEN SAUCE WITH CORNSTARCH: Mix 1 tablespoon cornstarch with 2 tablespoons water, then stir it into your teriyaki sauce before brushing it on. I used to skip this, and the sauce would pool like soup—now it clings to the chicken and caramelizes into a glossy glaze.
- REST UNDER FOIL: After baking, tent the chicken legs with foil and let them rest for 5–10 minutes. This keeps the meat juicy while the skin finishes crisping—no more dry, sad drumsticks when you cut into them. (Yes, even if you’re impatient like me.)
Regional styles of these flavors
Japanese Home Style
In Japan, teriyaki chicken legs are often prepared as yaki toriniku, a home-style dish where the chicken is marinated in a simpler version of the sauce and baked until the skin crisps.
The Japanese version typically uses mirin (a sweet rice wine) instead of honey, creating a more delicate balance of sweetness. I recommend substituting 1 tbsp mirin for the honey if you want to stay true to traditional flavors.
Serve with steamed shirataki noodles or onigiri rice balls for an authentic experience. 🍶
Hawaiian Luau Twist
Hawaiian-style teriyaki chicken legs incorporate tropical flavors like pineapple juice and lime zest into the marinade. Replace the rice vinegar with 2 tbsp pineapple juice and add 1 tsp lime zest to the marinade for a bright, citrusy kick.
Garnish with toasted coconut flakes and serve with grilled pineapple slices or macaroni salad for a true luau vibe. This variation is perfect for summer gatherings or themed parties. 🌺
Korean BBQ Fusion
For a Korean-inspired take, blend the teriyaki sauce with 1 tbsp gochujang (Korean chili paste) and 1 tsp sesame paste for a spicy, umami-rich glaze. Add 1 tbsp grated pear to the marinade to tenderize the chicken further, a technique used in Korean bulgogi.
Serve with ssamjang (Korean wrapping sauce) and lettuce wraps for a fun, interactive meal. The gochujang adds depth while keeping the dish balanced. 🌶️
Southern U.S. Comfort
In the Southern U.S., teriyaki chicken legs are often paired with bold, smoky flavors. Add 1 tsp smoked paprika and ½ tsp cayenne pepper to the marinade for a subtle heat, then serve over creamy mac and cheese or collard greens.
The contrast between the sweet glaze and smoky sides makes this a crowd-pleaser. For extra indulgence, drizzle with hot honey before serving. This version feels hearty and comforting, perfect for family dinners. 🔥
Thai-Inspired Sweet Chili
Infuse the teriyaki glaze with Thai flavors by adding 1 tbsp sweet chili sauce and 1 tsp fish sauce to the marinade. The sweet chili sauce replaces the brown sugar, while the fish sauce adds umami depth.
Garnish with thinly sliced Thai basil and serve with jasmine rice and stir-fried bok choy. This fusion brings a tangy, slightly spicy twist to the classic dish. 🌶️✨
Nutrition facts
Frequently asked questions
Can I use chicken thighs instead of drumsticks?
Use bone-in, skin-on chicken thighs (about 1.5 lbs) for similar results. Thighs cook slightly faster than drumsticks, so reduce baking time by 5-10 minutes and check for doneness at 165°F internal temperature. The skin will still crisp beautifully, but thighs stay juicier longer.
How do I prevent the glaze from burning before the chicken cooks through?
If the glaze starts caramelizing too quickly, tent the chicken loosely with aluminum foil for the last 10 minutes of baking. This traps heat while allowing air circulation. For extra insurance, bake at 375°F instead of 400°F—it takes 10-15 minutes longer but reduces burning risk. The glaze will still be glossy!
Can I make this recipe in an air fryer?
Yes! Preheat the air fryer to 375°F and cook the chicken for 20 minutes, flipping halfway. Spray with 1 tsp olive oil before air frying for extra crispiness. The glaze may not caramelize as deeply, so brush on extra sauce during the last 5 minutes. Air-fried skin will be crispy but slightly less golden than oven-baked.
What’s the best way to reheat leftovers?
Reheat in a 350°F oven for 10-15 minutes to restore crispiness. For a quick fix, use the air fryer at 350°F for 5 minutes. Avoid microwaving—it makes the skin soggy. Store leftovers in an airtight container for up to 4 days, or freeze for 3 months.
Can I use boneless chicken legs?
Boneless, skinless legs won’t crisp as well, but you can still make them tender and flavorful. Pat dry thoroughly, coat with marinade, and bake at 375°F for 25-30 minutes (no flipping needed). For crispy skin, wrap each piece in a thin bacon strip before baking—remove before serving. The texture will differ, but the sauce will still shine!