
Main Courses
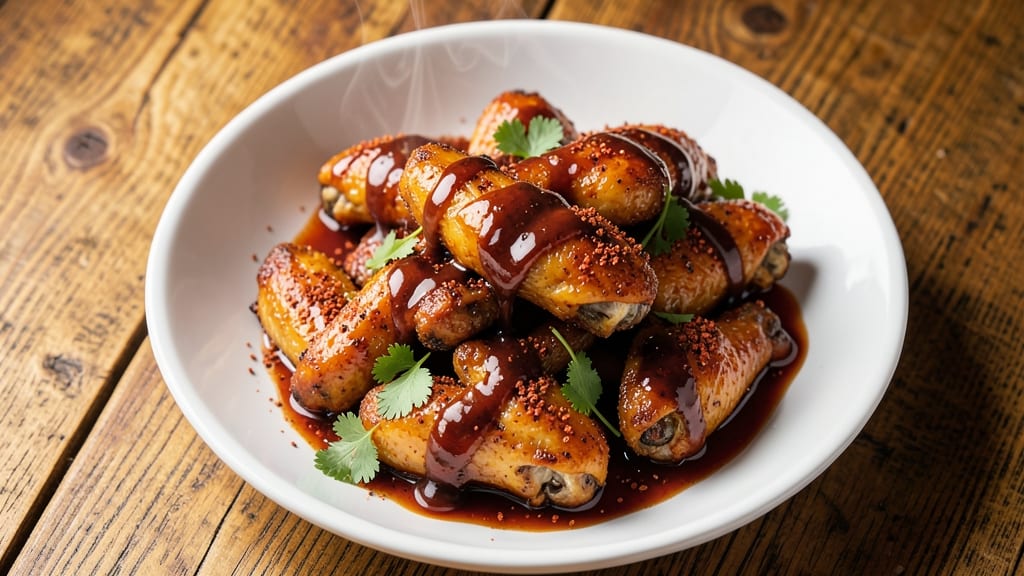
This baked honey BBQ chicken wings recipe delivers crispy skin and a sticky-sweet glaze that'll have everyone reaching for seconds. The secret lies in balancing smoky BBQ flavors with rich honey, creating a perfect harmony of textures and tastes.
I developed this recipe after years of perfecting the art of crispy wings without deep-frying—no greasy mess, just incredible flavor.
The magic happens when wings bake at high heat until golden and crispy, then get tossed in a tangy-sweet BBQ sauce with honey that caramelizes into a glossy finish. This method ensures tender meat inside while maintaining that satisfying crunch outside.
The sauce is simple but packed with depth, thanks to a blend of spices and a touch of apple cider vinegar for balance.
What you'll end up with is a platter of wings that are crispy on the outside, juicy on the inside, and coated in a glaze that's perfectly sweet and smoky.
The aroma alone will have your kitchen smelling like a restaurant, and the first bite delivers that perfect combination of textures and flavors. This recipe is foolproof and ready in about an hour.
Serve with celery sticks, carrot sticks, and a side of ranch or blue cheese dressing for the full game-day experience. The wings stay crispy even when reheated, making them perfect for parties or meal prep. Let's get started on this crowd-pleaser!
Ingredients for baked honey bbq chicken wings
Five simple ingredients transform ordinary wings into restaurant-worthy crispy, sticky-sweet magic.
| Ingredient | Amount | Notes |
|---|---|---|
| Chicken Wings 🍗 | 2 lb | Split into drumettes and flats |
| Honey 🍯 | ½ cup | Raw, for sticky glaze |
| BBQ Sauce 🍅 | ¾ cup | Store-bought or homemade |
| Apple Cider Vinegar 🍏 | 1 tbsp | For tangy balance |
| Smoked Paprika 🌶️ | 1 tbsp | For smoky depth |
| Garlic Powder 🧄 | 1 tsp | Freshly ground preferred |
| Onion Powder 🧅 | 1 tsp | For subtle sweetness |
| Salt 🧂 | 1 tsp | Kosher or sea salt |
| Black Pepper 🌶️ | ½ tsp | Freshly cracked |
| Olive Oil 🫒 | 1 tbsp | For crispy coating |
| Cornstarch 🌾 | 1 tbsp | For extra crispiness |
| Celery Sticks 🧅 | 2 cups | For serving (optional) |
| Carrot Sticks 🥕 | 2 cups | For serving (optional) |
| Blue Cheese Dressing 🧀 | ½ cup | For dipping (optional) |
The wings are the star—split drumettes and flats for even cooking. Grab bone-in, skin-on wings from the meat counter (no frozen, trust me). Trader Joe's and Costco have great prices, but any grocery store's fresh chicken works. Pat them dry before baking—this is non-negotiable for crispiness. If you're feeling fancy, Wegmans sells pre-split wings, saving you 10 minutes of prep. For extra crunch, toss the wings in cornstarch after baking before glazing.
No honey? Maple syrup works in a pinch (same amount), but the flavor won't be identical—honey's floral notes are key here. The BBQ sauce can be store-bought (Sweet Baby Ray's is a crowd-pleaser) or homemade. Want more smokiness? Add 1/2 tsp liquid smoke to the glaze. The apple cider vinegar cuts through the sweetness—Bragg is my go-to, but any organic brand works. For a spicier kick, add 1/4 tsp cayenne to the sauce. Pro tip: Mix the glaze ingredients in a small saucepan and simmer 2 minutes for deeper flavor.
These wings stay crispy for 3 days in the fridge—just reheat at 375°F for 10 minutes. For parties, bake extra and freeze them un-glazed (they reheat best that way). The glaze can be made ahead and reheated gently. Store leftovers in an airtight container with parchment between layers to maintain crispiness. The celery and carrots? Buy pre-cut from Whole Foods or chop your own—they keep for 5 days in the fridge.
Why You'll Love This Recipe
- One-Pan Magic: The wings go in raw, come out sticky-glazed perfection—no messy fryer, no extra pans. Honestly, I’ve made wings that took my whole kitchen hostage; this? Just toss, bake, and enjoy.
- Sweet-Smoky Balance: That honey cuts through the tangy BBQ sauce while the apple cider vinegar and smoked paprika add depth. It’s not too sweet, not too smoky—just ridiculously good every time.
- Game for Any Gathering: Whether it’s a Super Bowl spread or a lazy Sunday, these wings handle the crowd. (Yes, even on a Tuesday night.) My in-laws asked for the recipe after one bite—no exaggeration.
- Leftovers That Don’t Suck: Most baked wings dry out by day two, but these? The glaze stays sticky, the meat stays tender. I’ve reheated them three times, and they’re still the star of the lunchbox. Budget-friendly too—wings are cheap, and this recipe stretches them far.
Step-by-step instructions for baked honey BBQ chicken wings
Here's how to achieve that perfect balance of crispy skin and sticky-sweet glaze every time.
Prep and Season the Wings for Maximum Crispiness
Preheat your oven to 425°F—this high temperature is key for that crispy skin. Pat the 2 lb chicken wings completely dry with paper towels. Any moisture left on them will steam instead of crisp up. Split each wing into drumettes and flats at the joint for even cooking.
In a large bowl, toss the wings with the 1 tbsp olive oil, 1 tbsp smoked paprika, 1 tsp garlic powder, 1 tsp onion powder, 1 tsp salt, and 0.5 tsp black pepper. Make sure every piece is evenly coated—this seasoning will create that perfect flavor base before the glaze goes on. Let them sit for 10 minutes at room temperature while you prepare the glaze.
Create the Sticky-Sweet Glaze
In a medium bowl, whisk together the 0.5 cup honey, 0.75 cup BBQ sauce, 1 tbsp apple cider vinegar, and 1 tbsp cornstarch. The cornstarch is the secret to that perfect glossy finish—it helps the glaze thicken just enough to stick without being too runny. Stir until the cornstarch dissolves completely and the mixture is smooth.
Here's the thing—don't skip the vinegar. It cuts through the sweetness just enough to balance the flavors perfectly. Taste it now (you can't ruin it yet) and adjust the salt if needed. The glaze should be thick enough to coat the back of a spoon but still flow easily when brushed on.
Bake the Wings to Crispy Perfection
Arrange the seasoned wings in a single layer on two large baking sheets lined with parchment paper or foil. Don't crowd them—they need space to crisp up properly. Bake for 25 minutes, flipping them halfway through at the 12-minute mark. You're looking for wings that are deep golden brown and crispy all over.
I press down gently on the wings during the first minute after flipping—this prevents them from curling and ensures even contact with the hot pan. They'll start to crisp up beautifully, and you'll smell that amazing caramelized aroma filling your kitchen. Don't walk away—this is the critical moment for that perfect texture.
Glaze and Finish for Maximum Stickiness
After the initial baking, remove the wings from the oven and transfer them to a large bowl. Drizzle the sticky-sweet glaze over them, making sure each piece gets coated thoroughly. Toss them gently with tongs to distribute the glaze evenly—this is where the magic happens.
Return the glazed wings to the baking sheets and bake for another 10-12 minutes at 425°F, until the glaze is bubbly and the wings are deep golden brown with a glossy finish. The glaze should be sticky but not dripping—if it's too runny, return them to the oven for another minute or two to thicken.
Serve with Crunchy Veggies and Cooling Dip
Let the wings rest for 2-3 minutes before serving—this gives the glaze time to set slightly and makes them easier to handle. Arrange them on a platter with the 2 cups celery sticks and 2 cups carrot sticks for that classic game-day crunch.
Serve with the 0.5 cup blue cheese dressing on the side for dipping. The cool, tangy dressing cuts through the sweetness of the glaze perfectly, balancing every bite. These wings are best served immediately while the glaze is still sticky and the wings are crispy—every bite delivers that perfect combination of textures and flavors.
Pro Tips For Making Baked Honey Bbq Chicken Wings
- Pat the Wings Dry: I learned this the hard way—wet wings steam instead of brown. Toss them in paper towels before seasoning, even if they look fine. The extra 30 seconds saves you from sticky, under-crusted wings that taste more like soup than BBQ.
- Bake in Two Batches: Crowding the tray? Don’t. Wings need space to crisp, not a steam bath. Bake them in single layers on two racks or trays—yes, it takes longer, but the result is a proper caramelized glaze, not a sad, soggy mess.
- Mix the Glaze Early: Combine honey, BBQ sauce, and apple cider vinegar before baking, not just as a post-bake drizzle. The acid in the vinegar cuts through the sweetness while the heat helps it cling better—no last-minute sticky fingers or uneven coating.
- Check Internal Temp: Skip the guesswork—use a meat thermometer. Wings are done at 165°F, but if you pull them at 160°F, they’ll finish cooking while you’re distracted. Overcooked wings dry out fast, and no one wants a chewy bite ruining that perfect sticky-sweet crust.
Storing and reheating this dish
Fridge Storage Secrets
Store leftover wings in an airtight container lined with parchment paper to maintain crispiness. I place them in a single layer first, then add another layer on top—this prevents soggy bottoms.
Keep them refrigerated for up to 3 days, but honestly, they rarely last that long in my house! 🥗
Freezer Prep for Parties
For game-day gatherings, bake extra wings and freeze them un-glazed—this is the trick to reheating them perfectly. Store in a freezer bag with parchment between layers, and they'll keep for 2 months.
When ready to serve, bake from frozen at 400°F for 30-35 minutes, adding glaze during the last 10 minutes.
Oven Reheating Method
My preferred way to reheat wings is in the oven at 375°F for 10-12 minutes—this restores that crispy skin without drying them out. Place them on a baking sheet lined with fresh parchment paper, drizzle with 1 tbsp water, and cover loosely with foil.
The steam keeps the glaze sticky while the oven heat recrisps the skin. 🔥
Air Fryer Quick Fix
For a faster option, use an air fryer at 375°F for 6-8 minutes, shaking the basket halfway through. This method works best for smaller batches—overcrowding leads to soggy wings. I like adding 1 tsp honey to the air fryer tray before cooking to enhance the sticky finish.
Microwave Hack (Last Resort)
If you're in a hurry, cover wings with a damp paper towel and microwave on high for 45 seconds. Let them rest 1 minute before serving—the glaze will be slightly less crispy but still delicious. This method works best for 1-2 servings at a time.
Glaze Refresh Tip
If the glaze looks dry after reheating, brush with 1 tsp honey mixed with 1 tsp water and broil for 1-2 minutes to restore that sticky shine. This little trick makes reheated wings taste almost as good as fresh ones—your guests will never know! ✨
Nutrition facts
Frequently asked questions
Can I use frozen chicken wings for this recipe?
Fresh wings yield the best results, but you can use frozen if necessary. Thaw them completely in the refrigerator overnight, then pat them thoroughly dry before seasoning. The extra moisture from frozen wings can make them less crispy, so increase your baking time by 5-7 minutes and watch closely for browning.
How do I make the glaze extra sticky?
The cornstarch in the glaze helps create that perfect stickiness, but for an even glossier finish, simmer the glaze ingredients together for 2-3 minutes before using. You can also add 1/2 tsp xanthan gum to the glaze mixture for extra cling—just stir it in with the cornstarch. The key is to coat the wings well after baking and return them to the oven briefly to set the glaze.
Why did my wings turn out soggy instead of crispy? Soggy wings usually happen from one of three things: not patting them dry enough, overcrowding on the baking sheet, or not baking long enough.
Can I make this recipe in the air fryer?
Preheat your air fryer to 400°F and cook the wings in batches for 12-15 minutes, shaking the basket every 5 minutes. After the initial cook, toss them in the glaze and air fry for another 4-5 minutes at 375°F. The air fryer works especially well for smaller batches and gives you that crispy texture without needing to monitor the oven as closely.
What's the best way to serve these wings for a party?
For a crowd, bake extra wings and keep them warm in a 200°F oven while serving. Set up a DIY station with small bowls of ranch, blue cheese, and extra glaze on the side. Use a chafing dish or slow cooker to keep the glaze warm for dipping. Serve with a variety of dipping sauces and let guests customize their own plates—this recipe is always a hit at gatherings!