
Main Courses
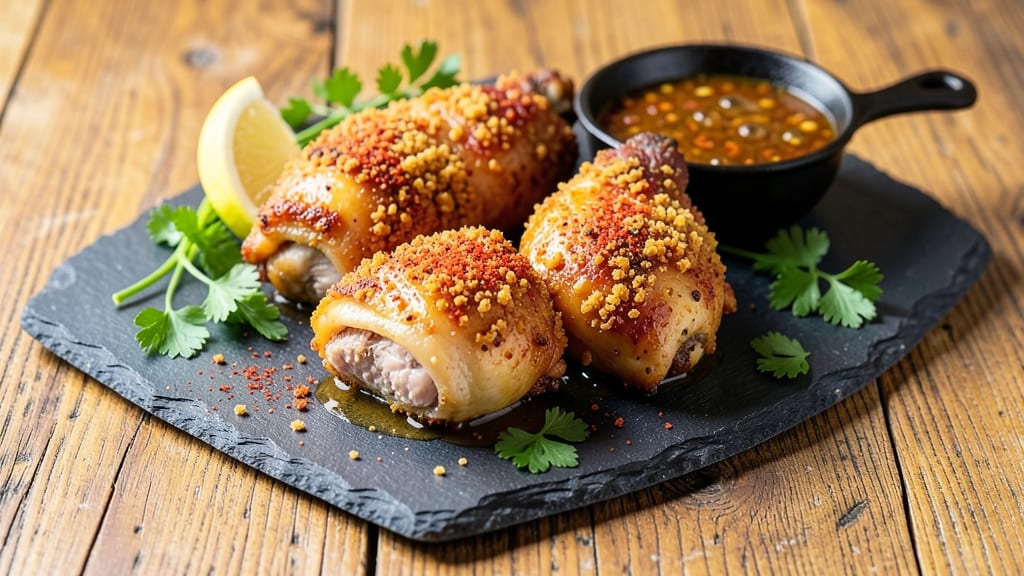
This baked fried chicken thighs recipe delivers juicy hearts and double-crisp layers without deep-frying. The secret? A buttermilk brine for tenderness, a double-dredge coating for maximum crunch, and a high-heat bake that locks in moisture while creating that coveted golden crust.
I've perfected this technique over years of testing—no greasy mess, just restaurant-quality results at home.
The process starts with a 30-minute buttermilk brine that transforms tough thighs into melt-in-your-mouth perfection. After a quick pat dry, we use a two-step breading method (flour, seasoned mix, and panko) that creates those irresistible crispy layers.
The magic happens at 375°F for 45 minutes, where the oven finishes what the breading started—crispy exteriors with juicy, tender meat inside.
What you'll end up with is chicken so crispy it shatters when you bite in, yet so juicy it practically melts in your mouth. The seasoning blend adds just the right amount of spice and savory depth without overpowering the natural flavor of the chicken.
This is the kind of dish that turns weeknight dinners into special occasions—without the fuss of deep-frying.
Serve with classic sides like mashed potatoes, coleslaw, or cornbread to complete the meal. The leftovers reheat beautifully too, making this a great recipe for meal prep. Let's get started on creating your perfect batch of baked fried chicken thighs.
Ingredients for baked fried chicken thighs
Juicy hearts and double-crisp layers start with these quality ingredients for restaurant-style baked fried chicken thighs.
| Ingredient | Amount | Notes |
|---|---|---|
| Chicken Thighs, Bone-In 🍗 | 1 ½ lb | Skin-on for extra crispiness |
| Buttermilk 🥛 | 1 cup | Full-fat for best results |
| All-Purpose Flour 🌾 | 1 cup | For first dredge coating |
| Panko Breadcrumbs 🍞 | 1 ½ cups | Japanese-style for crispiness |
| Cornstarch 🌾 | 2 tbsp | For ultra-crispy texture |
| Dried Paprika 🌶️ | 1 tbsp | Smoked variety preferred |
| Garlic Powder 🧄 | 1 tbsp | Freshly ground preferred |
| Onion Powder 🧅 | 1 tbsp | For depth of flavor |
| Ground Black Pepper 🌶️ | 1 tsp | Freshly cracked preferred |
| Kosher Salt 🧂 | 1 ½ tsp | Diamond Crystal preferred |
| Olive Oil 🫒 | 2 tbsp | For greasing pans |
| Lemon Juice 🍋 | 1 tbsp | Brightens the flavor |
| Cornmeal 🌽 | ¼ cup | For extra crunch layer |
The chicken thighs are non-negotiable—bone-in, skin-on delivers the most flavor and crispiness. Look for thighs with good marbling at your local butcher or the meat counter at Whole Foods or Kroger. If you can't find bone-in, substitute bone-in, skinless thighs, but expect slightly less crispy skin. The buttermilk? Full-fat is essential—low-fat versions won't give you that tender, juicy result. For extra insurance, add 1 tbsp lemon juice to the buttermilk to tenderize the meat further. Panko breadcrumbs are a must—they create that signature shatteringly crisp texture, but if you're in a pinch, regular breadcrumbs will work in a bind.
No panko? Crush regular breadcrumbs in a food processor or blender for a finer texture. Running out of buttermilk? Substitute with whole milk + 1 tbsp vinegar or lemon juice, let it sit for 5 minutes to curdle. The cornstarch is key for that extra-crispy coating—don't skip it. For the seasoning blend, smoked paprika adds depth, but regular paprika works too. If you're short on time, pre-mixed seasoning blends from McCormick or Badia work fine. The cornmeal layer? Trader Joe's sells it in bulk, and it's worth the extra step—it creates that perfect crunch between the breading layers. For extra flavor, add 1/2 tsp cayenne to the seasoning mix if you like a little heat.
Pat the thighs very dry before brining—this helps the coating adhere better. Store leftover chicken in an airtight container for up to 3 days in the fridge, but reheat carefully: 350°F for 10-15 minutes covered with foil to prevent drying out. For meal prep, portion into individual containers with a side of mashed potatoes or coleslaw—everything stays crispy this way. The seasoning mix keeps well in a small jar for up to 6 months in a cool, dark place. Freeze extras of the fully breaded thighs for up to 3 months—just bake straight from frozen at 400°F for 55 minutes.
Why You'll Love This Recipe
- No Fuss Crisp: I swear by the buttermilk soak—just dump thighs in a bowl, let them sit while you make coffee. The panko-cornstarch mix (yes, that’s the secret) gives you actual fried texture without deep-frying drama.
- Double-Crunch Magic: That first bite? Crunchy crust, then tender meat—like someone took all the best parts of fried chicken and baked them into one perfect piece. The bone-in thighs stay juicy while the edges get dangerously crispy.
- Lunchbox Hero: Between us, these reheat like a dream. Pack them cold for sandwiches (trust me, the kids won’t complain) or toss them in a salad the next day. The flavor holds up better than takeout ever could.
- Budget Win: Bone-in thighs stretch my grocery budget, and the panko-cornstarch combo uses pantry staples. I made a whole batch for $12—enough for leftovers, dinner guests, and my lazy Sunday snacking. No waste, all flavor.
Step-by-step instructions for baked fried chicken thighs
Here's how to build those legendary double-crisp layers while keeping the meat juicy as can be.
Prep the Chicken with Buttermilk Marinade
Pat the 1.5 lb chicken thighs completely dry with paper towels—this is non-negotiable for crispy skin. I like to press down firmly to remove every last bit of moisture. Place them in a shallow dish and pour the 1 cup buttermilk over them, turning to coat evenly. Let them marinate in the refrigerator for at least 2 hours (overnight is even better).
The buttermilk does double duty here: tenderizing the meat and creating that signature crispy crust. You'll know it's working when the chicken absorbs the liquid and develops a slightly opaque surface. Don't skip this step—it's what separates good fried chicken from extraordinary.
Build the Double-Crisp Coating
In a large bowl, whisk together the 1 cup all-purpose flour, 2 tbsp cornstarch, 1 tbsp garlic powder, 1 tbsp onion powder, 1 tbsp dried paprika, 1.5 tsp kosher salt, and 1 tsp ground black pepper. The cornstarch is what gives us that ultra-crispy texture, so don't skip it. In a separate bowl, mix the 1.5 cups panko breadcrumbs and 0.25 cup cornmeal—this second layer adds that signature crunch.
Remove the chicken from the buttermilk (let any excess drip off) and dredge each piece thoroughly in the flour mixture, pressing gently to adhere. Then dip each piece in the buttermilk again for just a moment before coating with the panko-cornmeal mixture. Press this second layer firmly so it sticks. I like to work in batches to keep things organized.
Preheat and Arrange for Maximum Crisp
Preheat your oven to 425°F with a wire rack placed inside a rimmed baking sheet. This rack is crucial—it allows hot air to circulate underneath the chicken, creating crispy skin on all sides. Lightly grease the rack with 2 tbsp olive oil and arrange the coated chicken thighs on it, leaving about 1 inch between each piece. They won't spread much, but you want room for even browning.
For extra crispiness, I like to spray the tops with a tiny bit of olive oil using an oil mister. This helps the crumb coating adhere better and promotes that golden-brown finish. The lemon juice comes into play here too—drizzle 1 tbsp lemon juice over the chicken just before baking. It brightens the flavor and helps prevent the coating from becoming too heavy.
Bake to Golden Perfection
Bake the chicken for 40-45 minutes, flipping the thighs halfway through at the 20-minute mark. You're looking for skin that's deep golden brown with crispy layers that crackle when you touch them. The internal temperature should reach 165°F when measured in the thickest part of the thigh.
Here's the thing about baked fried chicken—timing is everything. If you open the oven door too early, you'll lose heat and steam the skin instead of crisping it. Resist the temptation! The chicken will continue cooking slightly after you remove it from the oven, so pull it out when the skin is just starting to get that beautiful golden color.
Rest and Serve with Confidence
Transfer the chicken to a wire rack and let it rest for 5-10 minutes before serving. This resting period is crucial for juiciness—it allows the meat to redistribute its juices instead of releasing them all onto your cutting board. The result? Each bite will be perfectly crisp on the outside and impossibly juicy on the inside.
Serve immediately with your favorite sides—mashed potatoes, coleslaw, or buttery cornbread all work beautifully. The double-crisp layers will stay crispy for about 20 minutes, so don't wait too long. And trust me, the first bite is worth the effort—crunchy, flavorful, and juicy all at once. That's the magic of this technique.
Pro Tips For Making Baked Fried Chicken Thighs
- Preheat Twice: Run your oven to 425°F first, then turn it off and crack the door for 5 minutes to burn off any lingering smoke or residue. After that, blast it back to 425°F—this keeps your thighs from tasting like a gas station. (Yes, I’ve done the "skip this" thing. Don’t.)
- Soak Thighs Cold: Submerge bone-in thighs in buttermilk for at least 4 hours, ideally overnight. The cold temperature tenderizes the meat better than room temp, and the fat keeps the coating from turning into a sad, dry crust. I used to rush this—now I just set it and forget it.
- Mix Cornstarch Last: Toss panko with flour first, then fold in 2 tablespoons cornstarch right before dredging. This keeps the crust crispy longer—cornstarch added too early just turns gummy. (I learned this after my first batch turned into a breading brick.)
- Bake in Batches: Don’t overcrowd the tray—space thighs ½ inch apart or they’ll steam instead of crisp. If you’re baking more than 6, do two rounds. The first batch will steal all the heat, and you’ll end up with soggy second-thought thighs. (I’ve been there.)
Flavor customization for baked fried chicken thighs
Spicy Heat Kick
For a fiery twist, add ½ tsp cayenne pepper to your seasoning mix or sprinkle 1 tsp smoked paprika over the breaded thighs before baking. If you love heat, try a chili-lime coating—mix 1 tbsp chili powder with the cornmeal layer.
For a smoky finish, brush the baked chicken with 1 tbsp hot sauce (like Cholula) after removing from the oven. 🌶️
Sweet & Tangy Glaze
Balance the richness with a sweet-tangy glaze. Mix 2 tbsp honey with 1 tbsp Dijon mustard and brush it on the thighs after the first 20 minutes of baking. For extra zing, add 1 tsp lemon zest to the glaze.
This caramelizes beautifully, creating a sticky, glossy finish. I love this with a sprinkle of flaky sea salt before serving.
Herb-Infused Variations
Swap out the garlic and onion powders for fresh herbs. Try 1 tbsp chopped thyme or 1 tbsp oregano in the flour mixture for a Mediterranean twist. For a Southern-inspired flavor, add 1 tbsp finely chopped rosemary and 1 tsp onion powder to the panko layer. Fresh herbs add brightness and complexity—just
Cheesy Crunch Layer
For a decadent upgrade, mix ¼ cup shredded sharp cheddar or Parmesan cheese into the panko-cornmeal layer. The cheese melts slightly during baking, creating pockets of gooey goodness. I recommend Monterey Jack for a milder, creamier option. Sprinkle extra cheese on top before baking for a golden, bubbly crust.
Citrus Zest Boost
Brighten the flavor profile with citrus. Add 1 tsp lemon zest or orange zest to the buttermilk brine, or sprinkle ½ tsp zest over the breaded thighs before baking.
The acidity cuts through the richness, making each bite more vibrant. Pair with a honey-lime drizzle at the table for extra freshness. 🍋
Smoky BBQ Twist
For a smoky-sweet variation, mix 1 tbsp BBQ seasoning (like Stubb’s) into the flour mixture. After baking, brush the thighs with 2 tbsp BBQ sauce (I love Sweet Baby Ray’s) and broil for 2-3 minutes to caramelize.
This adds a sticky, saucy finish that’s perfect for serving with coleslaw or cornbread.
Nutrition facts
Frequently asked questions
Why do I need to pat the chicken thighs completely dry?
Moisture is the enemy of crispy coatings! When you pat the thighs dry, you remove surface moisture that would prevent the flour and breadcrumbs from sticking properly. This creates that signature shatteringly crisp texture we're after. Pro tip: Use paper towels and press firmly—don't just wipe them.
Can I use boneless chicken thighs instead?
You can, but you'll miss out on extra flavor and juiciness. Bone-in thighs stay more tender during cooking, and the bone helps conduct heat evenly. If you must use boneless, look for skinless thighs and reduce baking time by 5-7 minutes to prevent overcooking.
What's the secret to keeping the chicken juicy?
The buttermilk brine and proper resting time are key. The acid in buttermilk breaks down proteins for tenderness, while resting after baking (not cutting immediately) lets juices redistribute. Never skip the 5-10 minute rest—this is what keeps your chicken from being dry.
Why does my coating fall off during baking? This usually happens when the chicken isn't dry enough or the coating isn't pressed firmly.
Can I make this ahead of time?
Bread the chicken up to 24 hours ahead and store in the fridge. When ready to bake, let it sit at room temperature for 30 minutes before baking. For best results, bake straight from the fridge (add 10 minutes to baking time) if you're short on time.