
Main Courses
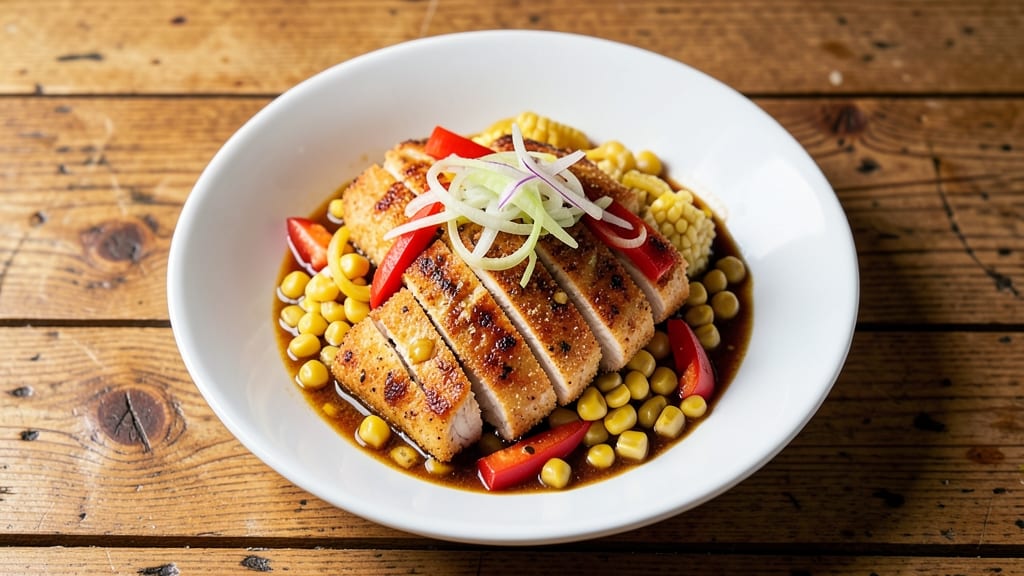
Applebee's Chicken Stir Fry delivers that signature restaurant experience with crispy-tender chicken and a rich soy-ginger sauce that balances sweet, savory, and umami. The secret lies in high-heat stir-frying to achieve that perfect texture—golden edges with juicy centers—while the sauce caramelizes just enough to coat every bite.
I've replicated this dish after years of analyzing restaurant versions, and the result is a recipe that's both foolproof and packed with flavor.
What sets this recipe apart is the balance of techniques: searing the chicken in small batches prevents overcrowding, ensuring maximum crispiness, while the sauce simmers until it thickens just enough to cling to the chicken and vegetables.
The combination of fresh ginger, garlic, and a touch of brown sugar creates that familiar Applebee's flavor profile without requiring specialty ingredients. With just 30 minutes of active prep time, you'll have a restaurant-quality meal ready to serve.
By the time you're done, you'll have perfectly seared chicken pieces with crispy edges and tender interiors, tossed in a glossy sauce that's savory, slightly sweet, and aromatic. The vegetables stay crisp-tender, adding color and freshness to each bite.
This dish is hearty enough to be a main course but flexible enough to pair with rice, noodles, or even as a filling for wraps.
The best part? Leftovers reheat beautifully, making this an ideal meal for busy weeknights or meal prep. Whether you're serving a family dinner or hosting friends, this recipe delivers the same satisfaction as your favorite restaurant visit. Let's get started on recreating that iconic Applebee's flavor at home.
Ingredients for applebee's chicken stir fry
Foolproof ingredients for that iconic Applebee's stir-fry experience at home.
| Ingredient | Amount | Notes |
|---|---|---|
| Boneless, Skinless Chicken Breast 🍗 | 1 ½ lb | Cut into 1-inch strips for even cooking |
| Cornstarch 🌾 | ½ cup | For crispy coating |
| Vegetable Oil 🫒 | ½ cup | High smoke point for searing |
| Red Bell Pepper 🌶️ | 1 whole | Sliced into thin strips |
| Yellow Onion 🧅 | 1 whole | Thinly sliced for quick cooking |
| Fresh Ginger 🌿 | 2 tbsp | Finely grated for authentic flavor |
| Garlic Cloves 🧄 | 4 cloves | Minced for aromatic base |
| Low-Sodium Soy Sauce 🥢 | ½ cup | For umami depth |
| Brown Sugar 🍯 | 2 tbsp | Balances sweet and savory |
| Rice Vinegar 🍶 | 2 tbsp | Brightens the sauce |
| Sesame Oil 🫒 | 1 tbsp | Adds nutty aroma |
| Green Onions 🧅 | 4 whole | Sliced for garnish |
| White Rice 🍚 | 2 cups | Uncooked, for serving |
| Salt 🧂 | 1 tsp | Kosher or sea salt |
| Black Pepper 🌶️ | ½ tsp | Freshly ground for heat |
The chicken is the star—boneless, skinless breasts cut into even strips cook faster and stay juicier than thighs. Look for fresh cuts at the grocery store's seafood or meat counter, where they're kept coldest. If you can't find boneless breasts, ask the butcher to trim them for you. For the cornstarch coating, Bob's Red Mill is my go-to brand—it's fine enough to create that perfect crispy crust without clumping. The bell pepper and onion should be vibrant and firm, not wilting or soft. Fresh ginger and garlic are non-negotiable here—they're the secret to that authentic Applebee's flavor profile.
No fresh ginger? Powdered works at half the amount, but it lacks that bright zing. Running short on soy sauce? Coconut aminos or tamari are great substitutes, though the color will differ slightly. Want to make this dish gluten-free? Swap the soy sauce for a tamari or gluten-free soy sauce. The brown sugar can be swapped for coconut sugar or even a touch of honey if you're not strict about vegan diets. For extra crispiness, double the cornstarch to 1 cup, but don't skip the vegetable oil—it's what creates that signature sear.
Chicken strips keep best in the fridge for 2 days if prepped ahead, but I recommend cooking them fresh for maximum crispiness. The sauce can be made a day ahead and stored in an airtight container in the fridge—it actually tastes better after the flavors meld overnight. For serving, I like to portion the rice into individual containers and keep the stir-fry separate until ready to toss. This dish reheats beautifully—just add a splash of water or soy sauce to the pan and warm through on medium heat. Leftovers keep for 3-4 days in the fridge.
Why You'll Love This Recipe
- Here’s what sold me: this reheats like a dream for lunches, and the flavors don’t fade. Toss in some rice, pack it up, and you’ve got a meal that’ll still taste fresh by noon—no sad, soggy stir-fry here.
- No-Fuss Protein Power: Between us, this recipe turns bland chicken breast into something actually exciting—just a quick cornstarch toss and sear. No brining, no marinating, no stress. That crispy exterior? Pure magic with zero effort.
- Restaurant-Quality Crunch: Honestly, the cornstarch coating on the chicken is where it’s at—crispy edges that shatter like the real deal, but I’m making it at home. The bell pepper and onion add that sweet, slightly charred depth that makes it taste like you ordered it, not just copied it.
- Lunchbox Hero: Here’s what sold me: this reheats like a dream for lunches, and the flavors don’t fade. Toss in some rice, pack it up, and you’ve got a meal that’ll still taste fresh by noon—no sad, soggy stir-fry here.
Step-by-step instructions for Applebee's-style chicken stir fry
Here's how to recreate that signature restaurant texture—crispy outside, tender inside—with a glossy soy-ginger sauce.
Prep the Chicken for Maximum Crispiness
Slice the 1.5 lb boneless, skinless chicken breast into 1-inch strips—this size ensures even cooking and that perfect crispy-tender bite. Place the strips in a large bowl and add ½ cup cornstarch, tossing gently until each piece is lightly but evenly coated. I like to use my hands for this because it helps the cornstarch adhere better than a spoon would.
Let the coated chicken sit for 10 minutes while you prep the rest. This resting time allows the cornstarch to form a proper crust. If you skip this, the coating will clump and fall off during frying. Also, pat the chicken dry with paper towels before coating—any moisture will prevent that golden crust from forming.
Sear the Chicken in Hot Oil
Heat ½ cup vegetable oil in a large skillet over medium-high heat until it shimmers but doesn't smoke (around 350°F). Working in batches to avoid crowding, add the chicken strips and cook for 3-4 minutes per side until they turn a deep golden brown. You're aiming for that crispy exterior while keeping the inside juicy—don't walk away during this step.
Once golden, transfer the chicken to a paper towel-lined plate to drain excess oil. If the oil starts smoking too much, reduce the heat slightly. The chicken should release easily from the pan when ready—if it sticks, your oil isn't hot enough. Keep the cooked chicken warm in a 200°F oven while you prep the vegetables and sauce.
Stir-Fry the Vegetables Until Tender-Crisp
In the same skillet (no need to clean it—the fond adds flavor), add ½ cup vegetable oil and heat over medium-high heat. Add the sliced red bell pepper and yellow onion, stirring frequently for 4-5 minutes until they soften but still retain a slight crunch. You want them tender enough to eat but not mushy.
Add the minced garlic cloves and finely grated ginger, cooking for 30 seconds until fragrant. Here's where the magic happens—the ginger and garlic should sizzle just enough to release their oils without burning. If they darken too quickly, reduce the heat slightly. Remove the vegetables and set aside with the chicken.
Build the Signature Soy-Ginger Sauce
Return the skillet to medium heat and add ½ cup low-sodium soy sauce, 2 tbsp brown sugar, and 2 tbsp rice vinegar. Let it simmer for 2-3 minutes until slightly reduced and syrupy. The sauce should coat the back of a spoon—if it's too thin, simmer another minute. Stir in 1 tbsp sesame oil and remove from heat.
Here's the thing—this sauce is the soul of the dish. The brown sugar balances the acidity of the rice vinegar, while the soy sauce provides that deep umami flavor. Taste it now and adjust seasoning if needed—you might want to add a pinch more salt or sugar to match your preference.
Combine and Finish with Fresh Garnishes
Return all the chicken and vegetables to the skillet with the sauce. Toss everything together for 1-2 minutes until well coated and heated through. The residual heat will help the sauce cling to the chicken. If the sauce looks too thick, add 1-2 tablespoons of water to loosen it slightly.
Garnish with sliced green onions and serve immediately over 2 cups cooked white rice. The contrast of the warm, crispy chicken over fluffy rice is what makes this dish so satisfying. Each bite should deliver that perfect balance of crispy chicken, tender vegetables, and glossy, savory sauce.
Pro Tips For Making Applebee'S Chicken Stir Fry
- CHOP ONIONS THINLY: I used to slice my onions in thick half-moons like I was making a sandwich, and they’d sit like little bricks in the stir-fry. For this recipe, cut them into paper-thin strips—almost translucent—so they cook fast and blend right in. A sharp knife and quick, confident strokes make this easier than it sounds.
- USE HOT OIL, THEN LOW HEAT: The chicken needs to sear, not steam. Heat your oil until it shimmers (350°F or so), then add the chicken in a single layer—don’t crowd it. Let it sizzle for 2-3 minutes before stirring, or you’ll end up with gray, rubbery bits. After that, drop the heat to medium-low for the rest of the cook.
- DON’T SKIP THE CORNSTARCH RINSE: The recipe probably tells you to toss the chicken in cornstarch, but here’s the thing: if you don’t rinse off the excess after coating, you’ll get a gummy, gluey mess. Dip the chicken in the cornstarch mix, let it cling, then shake it off in the pan—just enough to get a light, crisp crust, not a thick paste.
- SAUTE PEPPERS FIRST: Bell peppers need more time than onions to soften, so start with them. Cut them into ½-inch strips, toss them in the pan with a little oil, and let them cook for 3-4 minutes until they just start to blister. By the time you add the chicken, they’ll be tender without turning to mush. (Yes, even if you’re impatient like me.)
Regional styles of this applebee's chicken stir fry
Texas-Style Twist
In Texas, this stir-fry gets a smoky, bold kick with 1 tbsp chipotle powder added to the sauce and ½ cup diced jalapeños tossed in during the final stir. I like to finish with crumbled queso fresco and a squeeze of lime for brightness.
The heat level is elevated but balanced by the sweetness of the brown sugar. 🌶️
Carolina BBQ Fusion
For a Southern take, swap the soy sauce for ½ cup BBQ sauce (I recommend Sweet Baby Ray's), add 1 tbsp apple cider vinegar to the sauce, and finish with pickled red onions.
The tangy, smoky flavors transform this into a Carolina-style BBQ stir-fry that's perfect for a casual family meal. Serve with cornbread instead of rice for full Southern flair.
Midwest Comfort Version
In the Midwest, this dish often includes ½ cup frozen peas and carrots for extra veggies, and the sauce gets a touch of Worcestershire sauce (1 tbsp) for depth.
I like to serve it with buttered egg noodles instead of rice. The hearty texture and familiar flavors make this a crowd-pleaser for potlucks and game days. 🏈
West Coast Lightened-Up
California chefs often lighten the dish by using low-sodium coconut aminos instead of soy sauce and adding 1 tbsp fresh lime juice to the sauce. Fresh cilantro and avocado slices on top add a bright, fresh contrast to the crispy chicken.
Serve with jasmine rice for a lighter, more refreshing take that still delivers bold flavors.
Northeast Italian-Inspired
For an Italian-American twist, replace the bell pepper with sliced mushrooms and add 1 tsp Italian seasoning to the sauce. Finish with grated Parmesan cheese and fresh basil.
This version works beautifully with farfalle pasta instead of rice. The earthy mushrooms and Italian herbs give it a completely different but equally satisfying profile. 🍝
Nutrition facts
Frequently asked questions
Can I use chicken thighs instead of breasts for this recipe?
You can, but thighs will be juicier and less crispy than breasts. For best results, pat them very dry and use 1.5 cups cornstarch (double the amount) for extra crispiness. Cook them 4-5 minutes per side at 325°F oil temperature to prevent overcooking. The skin-on version adds flavor but requires careful monitoring.
What's the secret to getting that restaurant-style crispy chicken?
The key is three things:
- Pat the chicken bone-dry before coating,
- Use hot oil (350°F) and don't overcrowd the pan, and
- Let the cornstarch-coated chicken rest 10 minutes before frying. The resting time helps the cornstarch form a proper crust that won't fall off during cooking.
Can I make this dish ahead of time or prep ingredients in advance?
Prep the sauce 1 day ahead and store it in an airtight container in the fridge. The chicken strips can be coated and frozen for 1 month—just thaw overnight before cooking. For the veggies, slice the bell pepper and onion 2 days ahead and store in separate containers. The best time to assemble is right before serving to maintain crispiness.
How do I fix rubbery chicken in my stir-fry?
Rubbery chicken usually means overcooking. For future attempts, use a meat thermometer and remove chicken when it reaches 165°F internally. If it's already rubbery, try this: Slice the chicken thinly, toss with 1 tbsp soy sauce and 1 tsp honey, then pan-sear for 1-2 minutes on high heat to crisp up the edges. The sauce will help mask the texture issues.
What other proteins work well in this stir-fry?
This recipe works beautifully with shrimp (toss with cornstarch and cook 2-3 minutes), tofu (press and cube first), or beef strips (use flank steak, marinate in soy sauce for 30 minutes). For shrimp, reduce cooking time to 1 minute per side—they cook faster than chicken. The sauce ratios remain the same for all proteins.